How to build a simple but cool IR (Infra Red) receiver.
Placing the IR receiver
The receiver is ready; we should now place it in the right place.[-]
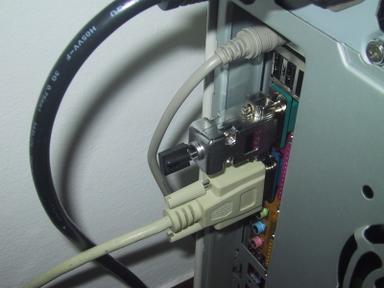
As we have mounted the receiving circuit inside the serial box, the first place you can think to mount it is on the back of the pc, inside the serial connector.

[-]
You can think that, as there is no direct line between you, sitting in front of the pc, and the serial receiver, on the back of the pc, this is not a good place for the device. However, IR signals can reflect on many surfaces: if you have a white wall behind the computer you will generally be able to use your remote control without problems.

[-]
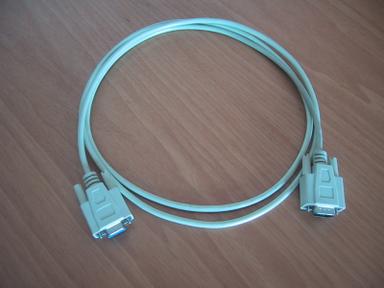
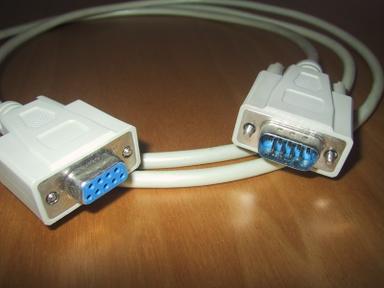
However, if you want to be able to put the receiver in a specific place, because the computer is far or its back is hidden, you can simply take a "straight" serial cable (*not* NULL-MODEM!!!) like this one: you will insert the receiver in one end of the cable and connect the serial port of the computrer at the other end.

[-]
What is the difference between a "NULL-MODEM" and a "straight" serial cable? It's simple. A NULL-MODEM cable is made to connect two computer by themselves. It has two female connectors and some wires inside are crossed to be connect the TX pin of one computer with the RX one of the other. This is not what we want for our receiver: we only need something to lengthen the link from the receiver to the serial port. A straight serial cable is depicted below: it has one female connector for the serial port and a male one for the receiver.

[-]
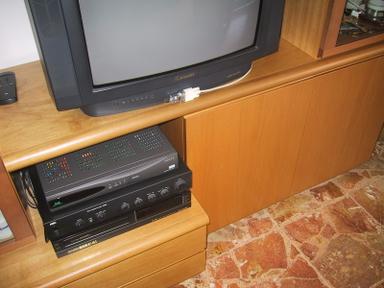
This is a picture of the tv-set in my living room. You can see very visible the serial cable and the IR receiver. Of course you can hide it better but a central position is very good, because you will be able to point the remte control where it's most natural.